
News

To change a car air filter, replace the engine air filter by opening the housing in the engine bay, removing the old filter, cleaning the housing, and installing a compatible replacement. To change the cabin air filter, access the filter compartment, usually behind the glove box, remove the old filter, and install a new one according to the airflow direction. For both filters, check the fit and secure all covers before finishing.
| Comparison | Engine Air Filter | Cabin Air Filter |
|---|---|---|
| Main purpose | Filters air entering the engine | Filters air entering the passenger compartment |
| Typical location | Inside an air filter housing in the engine bay | Behind the glove box, under the dashboard, or near the windshield intake |
| Common contaminants | Dust, dirt, and airborne debris | Dust, pollen, and other airborne particles, depending on the filter media |
| Main installation concern | Correct fit and proper sealing | Correct fit and airflow direction, where marked |
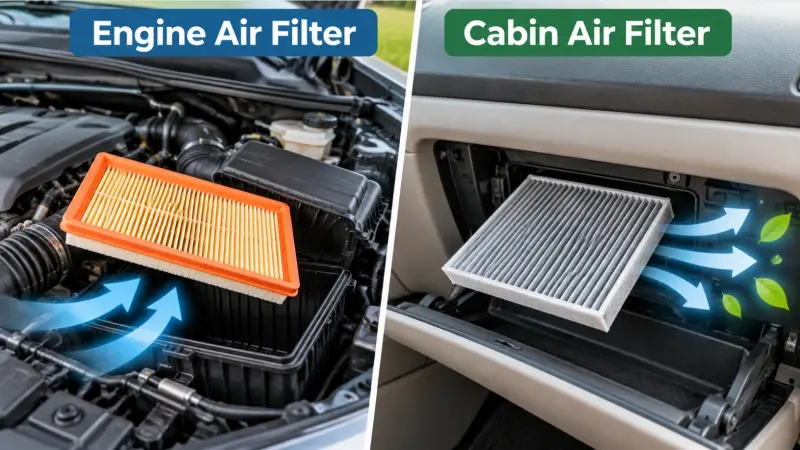
Replacing an engine air filter is a straightforward maintenance task on many vehicles. However, the housing design and fastening method vary by model, so always follow the manufacturer's instructions.
Before starting, park the vehicle on a level surface, switch off the engine, engage the parking brake, and allow hot engine components to cool. Prepare a compatible replacement filter and any tools required by your vehicle.
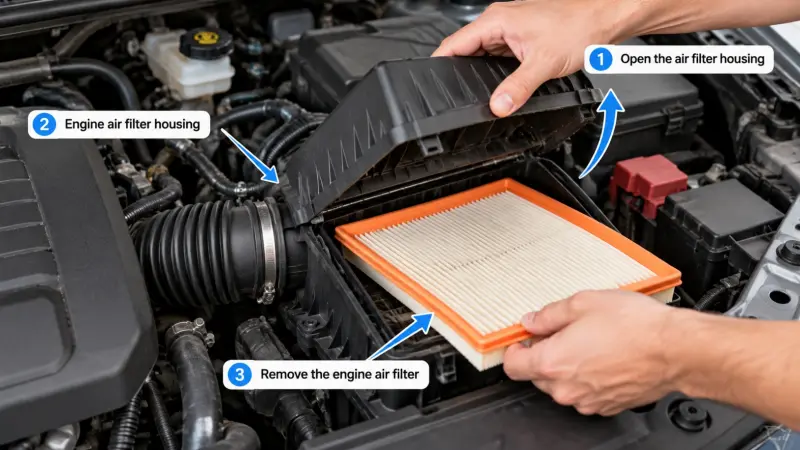
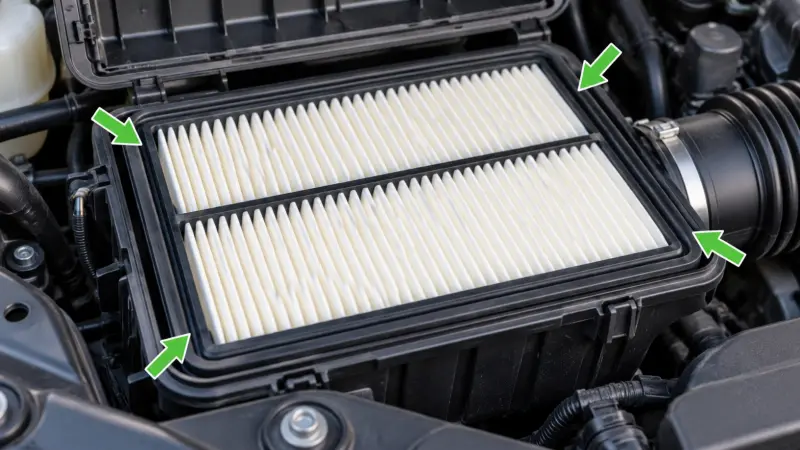
Open the hood and look for the engine air filter housing. It is commonly a black plastic box connected to the engine's air intake duct, although its shape and location vary between vehicles.
If you cannot identify the housing confidently, consult the owner's manual or a vehicle-specific maintenance guide. Do not confuse the engine air filter housing with other fluid or engine component covers.
Inspect the housing to determine how it is secured. Depending on the vehicle, you may find metal or plastic clips, screws, or other fasteners.
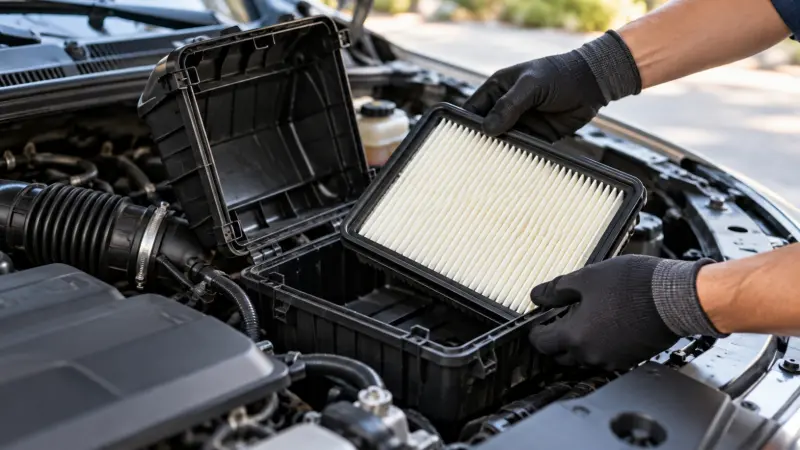
Release the clips or remove the necessary fasteners, then carefully lift the housing cover. Some designs may require loosening part of the intake duct or moving another component to access the filter.
Remove the old air filter without shaking loose debris into the intake opening. Take note of its position and how the sealing edges sit inside the housing. A quick photo before removal can help you remember the original arrangement.
Do not force the cover or clips. If the housing does not open easily, check for additional fasteners or model-specific instructions.
With the old filter removed, inspect the inside of the housing for dust, leaves, and other debris.
Use a clean, lint-free cloth to wipe accessible surfaces. Remove loose debris carefully, keeping contaminants out of the engine intake opening. Avoid using water or cleaning chemicals inside the intake system.
Also check the housing for cracks, damaged clips, and worn sealing surfaces. If the housing or seal is damaged, replacing the filter alone may not resolve the problem.
Compare the replacement filter with the old one before installation. Check the overall dimensions, shape, sealing edge, and part number to make sure the new filter is compatible.
Place the new filter into the housing in the orientation specified by the vehicle manufacturer. Make sure it sits flat and that the sealing edge fits evenly around the designated seat.
Do not bend the filter frame, force it into the housing, or leave gaps around the edges. A filter that does not fit properly may allow unfiltered air to bypass the filter media.
If the new filter looks different from the original, verify its compatibility before proceeding.
Reinstall the housing cover and secure all clips or fasteners. Confirm that the cover sits flush and that no part of the filter is trapped or pinched.
Check any intake duct connections you loosened during the process and make sure they are properly reattached.
Once everything is secured, close the hood and start the vehicle. Check for unusual intake noises or warning lights. If the engine runs abnormally or a warning appears, switch it off when safe and inspect the installation. Seek professional assistance if the cause is unclear.
A cabin air filter is often accessible without specialized equipment, although some vehicles require more extensive disassembly. The exact procedure depends on the vehicle's interior layout and HVAC design.
Turn off the ignition and HVAC fan before beginning. Consult the owner's manual for the filter location and any model-specific precautions.
The cabin air filter is commonly installed in one of three locations:
Behind the glove box: The glove box may need to be lowered or removed to access the filter compartment.
Under the dashboard: Some vehicles have a removable access panel near the passenger-side footwell.
Near the windshield intake: Certain models place the filter beneath a cowl panel near the base of the windshield.
These are common locations, not universal rules. Check your owner's manual before removing interior panels or exterior trim.
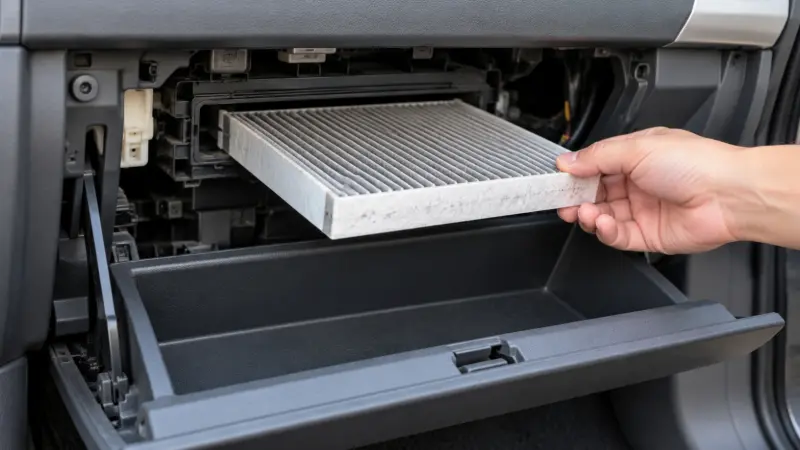
Once you locate the filter compartment, identify the access cover and its fastening mechanism. It may use clips, tabs, screws, or a sliding cover.
If the glove box must be lowered, follow the vehicle-specific instructions and avoid putting excessive pressure on its hinges or retaining tabs.
Remove the filter cover and slide out the old cabin air filter carefully. Pay attention to its orientation and any airflow markings. If the filter is heavily contaminated, remove it slowly to avoid scattering accumulated dust and debris.
Inspect the compartment for loose debris and check that the cover and retaining tabs are intact.
Before installing the replacement, confirm its part number and dimensions. The new filter should fit the compartment without being bent or compressed beyond what its design allows.
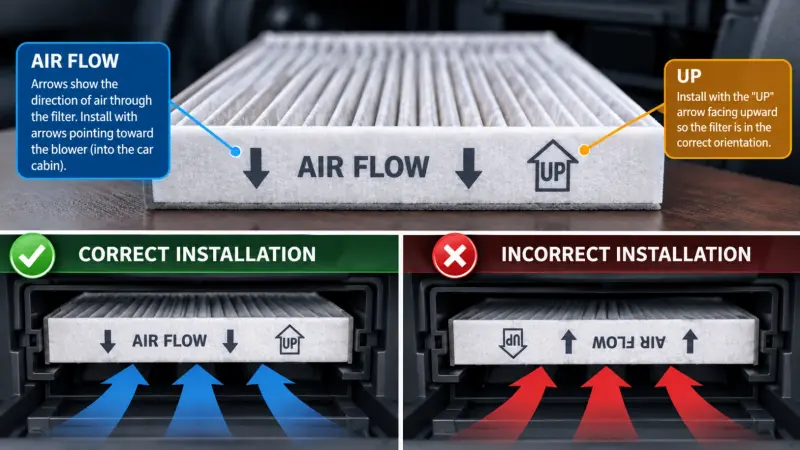
Check the markings on the filter frame:
AIR FLOW: The arrow indicates the direction in which air should pass through the filter.
UP: The arrow indicates which side should face upward.
These markings do not mean the same thing. Follow the marking provided on the replacement filter and verify the intended orientation against the vehicle's instructions.
Insert the filter in the correct direction and make sure it sits evenly in the compartment. If the filter has a flexible frame, do not fold or distort it unnecessarily during installation.
Cabin air filters come in different shapes, sizes, and filtration media to meet vehicle-specific requirements. Manufacturers use specialized cabin filter making machines to produce filter elements with different designs and specifications.
Reinstall the filter cover, glove box, access panel, or any other components removed during the process. Make sure all clips engage correctly and that no parts are left loose.
Switch on the vehicle's ventilation system and test the fan at several speeds. Air should flow normally from the vents, without unusual noises caused by a loose cover or incorrectly seated filter.
If airflow remains weak, check that the filter is the correct size, properly positioned, and installed in the right direction. Persistent airflow problems may indicate a separate issue with the blower motor, ventilation passages, or HVAC system.
The correct installation direction depends on the type of filter and its design. Engine air filters and cabin air filters should not automatically be treated the same way.
Many engine air filters are shaped to fit a specific housing and may not have a universal airflow arrow. Their correct orientation is determined by the housing design, sealing surface, and vehicle manufacturer's instructions.
If the filter has directional markings, follow them. Otherwise, use the owner's manual and the filter's installation instructions rather than assuming that every engine filter follows the same orientation rule.
The most important checks are that the filter fits the housing, the sealing edge sits evenly, and the housing closes completely.
Cabin air filters may carry either an airflow arrow or an upward-orientation arrow.
An AIR FLOW arrow indicates the direction of air movement through the filter. An UP arrow indicates the direction that should face upward inside the compartment.
For example, if a filter is marked AIR FLOW and the vehicle's instructions show air moving downward through the filter, the arrow should point downward. However, airflow direction varies by vehicle, so do not assume that every cabin filter should point up or down.
If the old filter's orientation is unclear, check the replacement instructions or vehicle manual before installing the new one.
Even though replacing a car air filter is relatively simple on many vehicles, a few common mistakes can affect the installation or the filter's performance.
| Common mistake | Why it matters | How to avoid it |
|---|---|---|
| Choosing the wrong filter | The filter may not fit or seal correctly | Confirm the part number and vehicle compatibility |
| Installing the filter in the wrong direction | Directional filters may not function as intended | Follow airflow markings and vehicle instructions |
| Leaving gaps around the filter | Unfiltered air may bypass the filter element | Check that the filter sits evenly in its housing |
| Forcing clips or covers | Plastic tabs and housing components may break | Identify all fasteners before removing the cover |
| Cleaning a disposable filter improperly | Water or unsuitable cleaning methods may damage the filter media | Follow the filter manufacturer's care instructions |
| Allowing debris into the intake | Loose contaminants may enter the engine intake system | Clean the housing carefully before installing the new filter |
| Forgetting to secure the housing | Loose covers or ducts may cause noise or other problems | Check every clip, screw, and connection before restarting |
Another mistake is assuming that a visibly dirty filter must always be replaced immediately, or that a filter that still looks clean can be used indefinitely. Appearance alone does not establish whether a filter has reached the end of its service life.
Follow the recommended maintenance interval and inspect the filter according to the vehicle manufacturer's guidance. Replace it sooner when the maintenance instructions or its physical condition indicate that replacement is necessary.
As a general guideline, replace an engine air filter every 12,000–15,000 miles (19,000–24,000 km) and a cabin air filter every 15,000–20,000 miles (24,000–32,000 km), or approximately every 1–2 years. The actual replacement interval depends on your vehicle manufacturer's maintenance schedule and driving conditions.
For most routine driving, a practical reference is to replace the engine air filter every 12,000–15,000 miles (19,000–24,000 km). In dusty environments, such as unpaved roads, construction areas, or off-road conditions, inspect it more frequently and consider replacement every 6,000–10,000 miles (10,000–16,000 km) if the filter becomes heavily contaminated. Some vehicles have longer factory-recommended intervals, so check your owner's manual before setting a replacement schedule.
Replace the cabin air filter approximately every 15,000–20,000 miles (24,000–32,000 km) or every 1–2 years, depending on the vehicle and filter condition. If you frequently drive in heavy traffic, dusty areas, or regions with high pollen levels, inspect it more often. Reduced airflow from the vents, persistent unpleasant odors, or visible contamination may indicate that replacement is needed.
Important: These figures are general maintenance references, not universal requirements. Always follow your vehicle manufacturer's recommended interval, and replace either filter sooner when the maintenance schedule or its condition calls for it.
Changing a car air filter is a manageable maintenance task for many vehicle owners, provided they identify the correct filter, follow the proper removal and installation steps, and use a compatible replacement.
For an engine air filter, focus on locating the housing, cleaning the filter seat, and ensuring that the replacement seals correctly. For a cabin air filter, pay particular attention to access-panel removal, airflow direction, and correct reassembly.
When in doubt, consult the owner's manual or a qualified technician. Correct fitment and installation are just as important as choosing the right replacement filter.
Previous: NULL
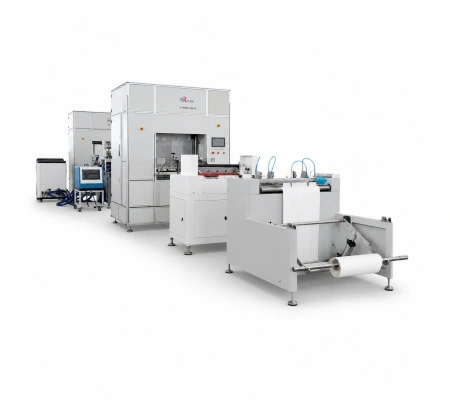
Pleating Height: 100–400 mm
Pleating Speed: 0–200 pleats/min
Max. Media Width: 700 mm
Max. Product Width: ≤650 mm
Production Capability: 25 m/min
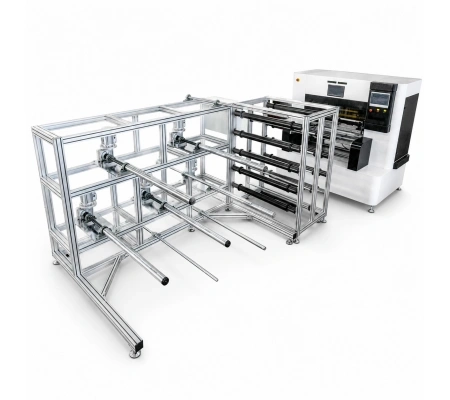
Working Width Range: 700–3000 mm
Pleating Height Range: 4–150 mm
Pleating Speed: Up to 400 pleats/min
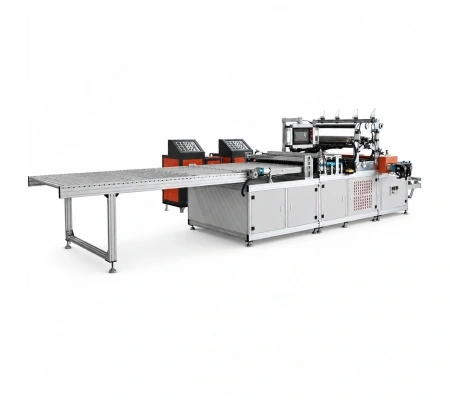
Max. Media Pleating Width: 1300 mm
Pleat Depth Range: 25–300 mm
Maximum Pleating Speed: 8–10 m/min
Hot Melt Nozzle Pitch: 25.4 mm
Online Slitting Cutters: 5 pcs
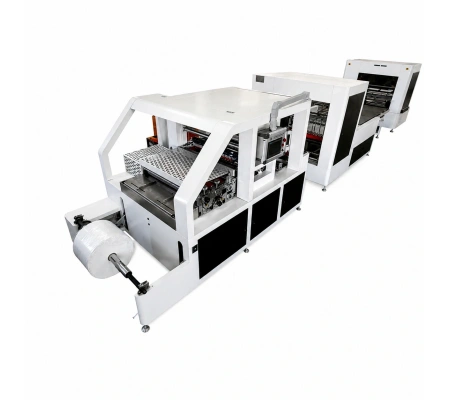
Max. Media Pleating Width: 700 mm
Pleat Depth Range: 16–100 mm
Maximum Pleating Speed: 8–10 m/min
Hot Melt Nozzle Pitch: 25.4 mm
Online Slitting Cutters: 5 pcs

Quick response within 24 hours

Expert advice tailored to your needs

End-to-end support for your success